SnapRoamer.com – White balance plays a critical role in capturing true-to-life colors on your phone camera, ensuring your photos and videos reflect the lighting environment accurately. Incorrect white balance results in unnatural color casts, such as overly blue or orange images, which degrade visual quality. This tutorial thoroughly guides you through using white balance presets, manual adjustments, locking methods for video, and post-processing techniques on smartphones—covering iPhones, Android devices, and popular camera apps like Camera+ and Lightroom. You will learn practical step-by-step methods to optimize color temperature and tint for various lighting scenarios, including daylight, incandescent, fluorescent, and shade.
Understanding how to control white balance on your phone enhances color accuracy in both photography and videography, improving overall image quality. Variations across phone brands and software mean mastering these techniques can help you troubleshoot and experiment for the best results in every shoot.
Understanding White Balance Presets on Your Phone Camera
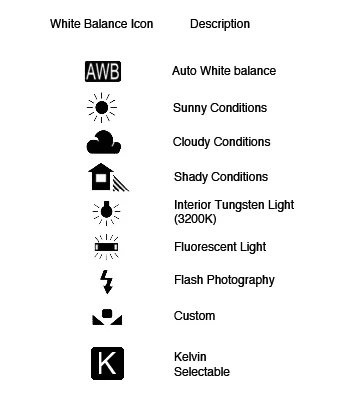
White balance presets automatically adjust your phone camera’s color temperature to neutralize color casts caused by different lighting conditions. These presets correspond to specific color temperatures measured in Kelvin (K), which represent the warmth or coolness of light.
Common white balance presets include:
Each preset adjusts the camera’s white balance algorithm to approximate the color temperature of the environment and reduce unwanted color casts. Selecting the appropriate preset ensures colors appear natural and consistent.
How to Use White Balance Presets on iPhone and Android Phones
Most native phone cameras offer Auto white balance (AWB) by default, but manual preset selection is available in advanced or pro camera modes.
For iPhone:
For Android Phones:
Camera+ App on iPhone:
Camera+ offers extended white balance control beyond the native app:
Using these presets in-camera helps you avoid time-consuming post-processing and achieves accurate color reproduction immediately.
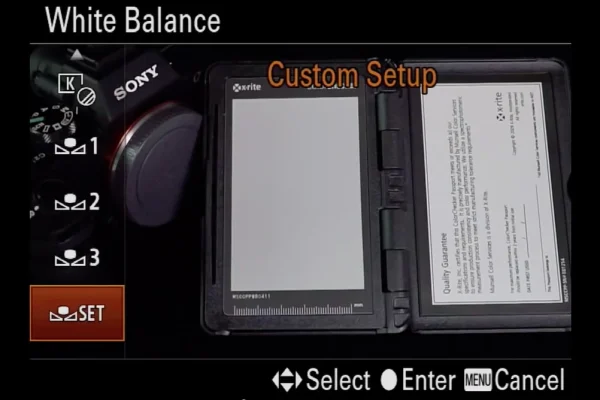
Custom White Balance Techniques for Precise Color Accuracy
When presets are insufficient, custom white balance lets you manually calibrate using a neutral reference such as a white or gray card, or even the back of a white iPhone.
Steps to set custom white balance manually:
This method compensates for mixed or challenging lighting where presets fail, especially under artificial light with unusual color casts.
Benefits of Custom White Balance:
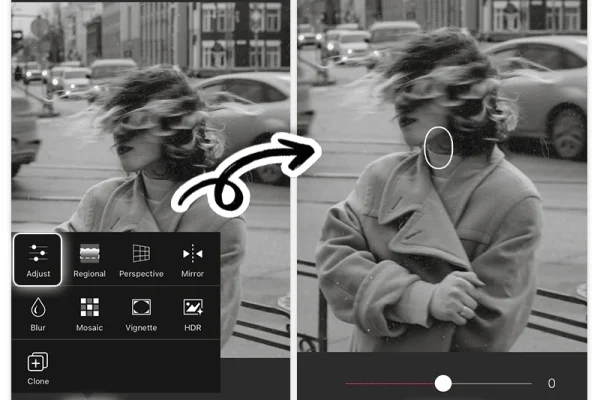
Adjusting White Balance in Post-Processing
Even with careful in-camera white balance, minor adjustments in post-processing can refine color accuracy further.
iPhone Photos App:
Lightroom Mobile App:
Video Editing Apps (e.g., Filmora):
Post-processing offers flexibility to fine-tune white balance after shooting, correcting any missed color imbalances.
Locking White Balance for Video Recording
Color shifts during continuous video recording occur when Auto White Balance adapts to changing lighting, causing distracting flickers or inconsistent hues.
Why locking white balance matters:
How to lock white balance:
Locking white balance stabilizes the color temperature, ensuring clean, natural-looking footage.
Variations in White Balance Controls Across Phone Brands and Apps
White balance settings vary by manufacturer and software:
Experimenting across apps and phones helps identify the best workflow for your needs. Troubleshoot common color casts by switching presets or calibrating custom white balance.
Troubleshooting Common White Balance Issues
Common Mistakes to Avoid
Alternative Methods for White Balance Control
| White Balance Preset | Color Temperature (Kelvin) | Typical Lighting Condition | Color Cast Correction |
|---|---|---|---|
| Daylight | 5200K | Bright sunlight | Neutral, natural colors |
| Cloudy | 6000-7000K | Overcast daylight | Warmer, reduces blue cast |
| Shade | 7000-8000K | Shaded outdoor areas | Warmer to counteract cool ambient light |
| Incandescent | 2700-3200K | Indoor tungsten bulbs | Reduces yellow-orange tint |
| Fluorescent | 4000-5000K | Fluorescent lighting | Neutralizes greenish-blue tint |
FAQ

How do I change white balance presets on my phone camera?
Access your camera’s manual or pro mode, then tap the white balance (WB) icon. Select a preset matching your lighting condition, such as Daylight or Incandescent. On iPhone, use third-party apps like Camera+ for easier preset control.
Can I manually set white balance on any smartphone?
Most modern smartphones with Pro or Manual camera modes allow manual white balance adjustment, either by selecting presets or setting custom Kelvin values. If unavailable in the native app, third-party apps provide this feature.
Why does my video color keep changing during recording?
Auto White Balance continuously adjusts to lighting changes, causing color shifts. Lock white balance before recording using AE/AF lock or manual settings in your camera app to maintain consistent color.
What is the Kelvin scale in white balance settings?
The Kelvin scale measures color temperature of light sources. Lower values (2700K) are warmer (orange), higher values (7000K) are cooler (blue). Adjusting Kelvin manually lets you precisely control white balance.
Can I fix white balance after taking a photo or video?
Yes. Editing apps like Lightroom for photos and Filmora for videos enable you to adjust temperature and tint sliders, or use eyedropper tools to correct white balance during post-processing.
White balance adjustment is a powerful tool for enhancing the authenticity and quality of your photos and videos. Mastering presets, custom calibration, and locking techniques empowers you to capture consistent color fidelity across diverse lighting conditions. Experiment with your phone’s camera modes and supported apps to find the optimal workflow suited to your shooting style.
For further in-depth insights, visit iPhone Photography School’s white balance guide and KobraTech’s white balance overview.