SnapRoamer.com – To master adventure travel composition, move beyond static landscapes by integrating human subjects for scale, using telephoto compression to stack layers, and applying leading lines to guide the viewer. True adventure photography requires balancing technical rules like the Rule of Thirds with the improvisational ability to capture movement and atmosphere under changing trail conditions.
As professional photographer Scott Kranz demonstrates, composition isn’t just about the frame; it’s about avoiding “pre-visualization blinders” that cause you to miss the best shots happening right behind you.
Composition Under Duress: Capturing Epic Frames While Exhausted
Composition under duress means maintaining visual discipline when physically fatigued or facing rapid weather changes. Focus on “compositional efficiency” by using a single prime lens or smartphone to reduce weight, utilizing the Rule of Thirds via grid overlays, and prioritizing high-impact, low-effort shots like low-angle perspectives to maximize visual interest without extra movement.
The Fatigue Factor: Efficiency over perfection
Chris Brinlee Jr. suggests that capturing epic photos while hiking requires a mindset shift toward efficiency. Relying on a single lens can reduce pack weight significantly, allowing for more energy to be spent on observing the scene rather than swapping gear.
A common failure mode is the “spray and pray” method, where a tired photographer clicks rapidly without checking the frame. To prevent this, remember that thought and patience make for wonderful elements of great travel photos.
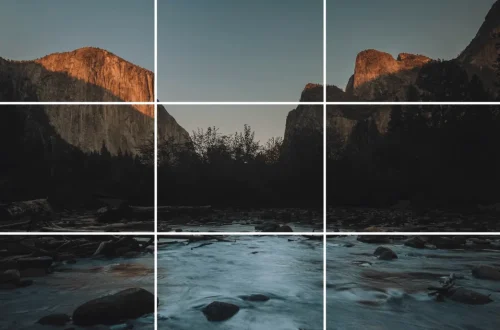
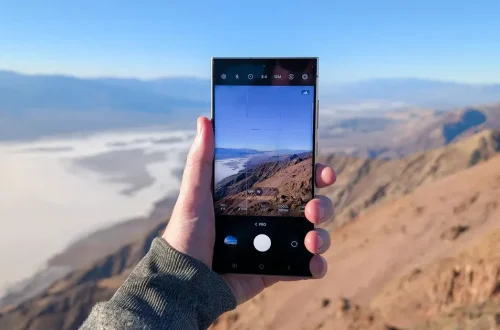
Shortcut: Enable the Grid overlay in your camera’s viewfinder or live view settings to instantly apply the rule of thirds without mental heavy lifting.
Improvisational Framing in Bad Weather
When weather shifts rapidly, the window for a perfect shot shrinks. If you lack the energy for complex setups, use the environment to your advantage. For instance, if you are using a GoPro, you can utilize TimeLapse mode to increase the probability of capturing a dramatic moment. Setting the capture frequency to 0.5 seconds or 1 second allows the camera to work while you rest, capturing movement that might otherwise be missed during a sudden storm or light shift.
The Motion-Centric Framework: Beyond Static Landscapes
Static landscapes often fail to convey the visceral energy of an adventure. Lola Akinmade Åkerström notes that capturing action in your photographs adds atmosphere that an otherwise straight-on shot cannot provide.
Capturing the ‘Stride’ of the Hike
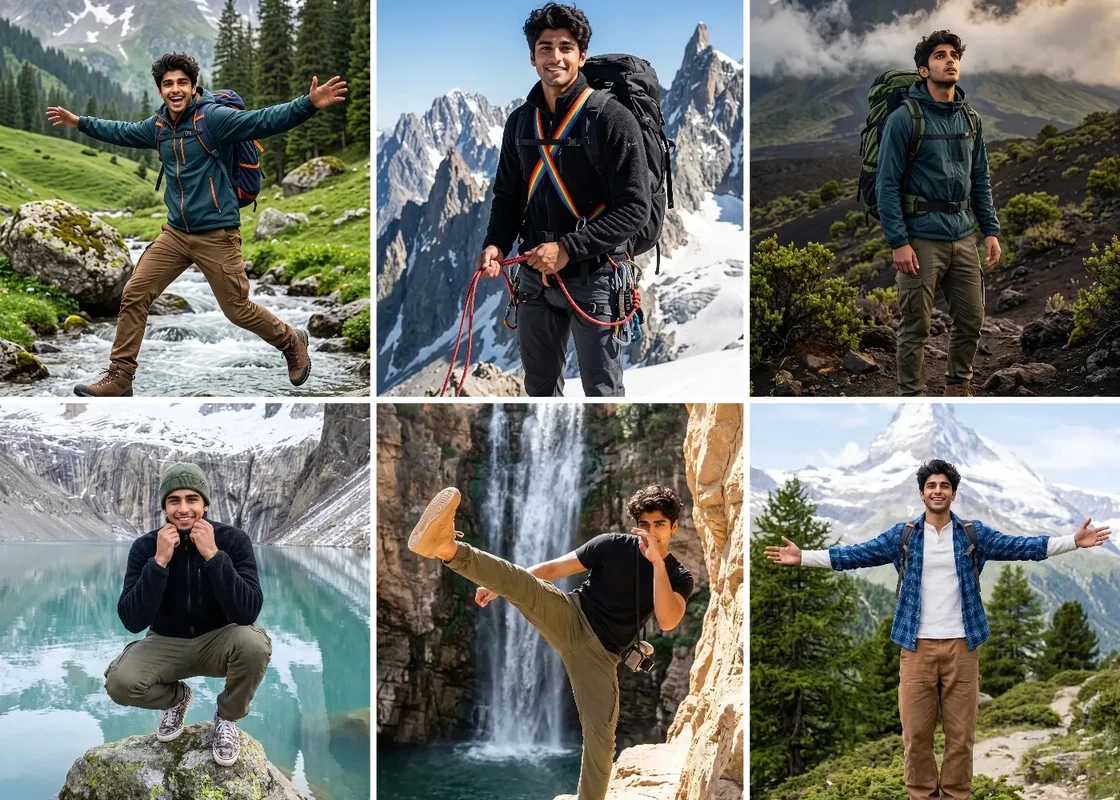
Movement provides a vital sense of scale and narrative. Including elements in action within your landscape shots adds a sense of scale in comparison to their backgrounds. This technique transforms a lonely mountain peak into a challenging destination by showing a hiker navigating a ridge.
Using Shutter Speed to Convey Movement
The technical execution of motion depends heavily on your shutter speed settings. To freeze a hiker mid-stride on a rocky trail, use a fast shutter speed such as 1/1000 sec. Conversely, if you want to convey the rushing energy of a mountain stream, a slower shutter speed can blur the water into a silky texture. However, failing to use a tripod during long exposures can result in blurry, unusable images rather than intentional motion blur.
- Freeze action: Use 1/1000 sec or faster.
- Convey flow: Use slower shutter speeds (e.g., 6 sec.) with a stable surface.
- Add atmosphere: Integrate moving subjects to break the stillness of the terrain.
Mastering Scale and Depth with Lens Selection
Achieve professional scale by using human subjects in wide landscapes and employing telephoto compression (70-200mm) to stack mountain ridges and flatten distances. While wide-angle lenses (16-35mm) capture the vastness, telephoto lenses create a painterly, layered effect by compressing the space between foreground and background elements.
The Wide vs. Telephoto Dilemma
Choosing the right focal length is a trade-off between breadth and depth. As Scott Kranz points out, having an adjustable focal length can open up unique compositions and creative opportunities. A wide-angle lens is essential for capturing the sheer magnitude of a canyon, but it can sometimes flatten layers into a thin, uninteresting strip. In contrast, telephoto lenses are superior for creating a sense of “stacked” geography.
| Lens Type | Focal Length | Compositional Strength | Primary Use Case |
|---|---|---|---|
| Wide-Angle | 16-35mm | Vastness and expansive views | Large landscapes and canyons |
| Telephoto | 70-200mm | Layer stacking and compression | Mountain ridges and distant textures |
| Telephoto | 100-400mm | Extreme detail and isolation | Wildlife or distant summits |
The following comparison highlights the differences between focal lengths used in landscape composition.
| Lens Type | Focal Length | Compositional Strength | Primary Use Case |
|---|---|---|---|
| Wide-angle lens | 16-35mm | Captures vastness; can flatten layers | Expansive vistas |
| Telephoto lens | 70-200mm | Stacks ridges; flattens distance | Layered, painterly landscapes |
The ‘Where’s Waldo’ Scale Technique
To prevent a massive mountain from looking like a small hill, you must provide a reference point. Placing a human subject—even a very small one—within the frame creates an immediate sense of scale. This makes the environment relatable and emphasizes the magnitude of the landscape. Taylor Duncan, a landscape and adventure photographer, emphasizes the importance of selecting the right glass to execute these specific visual goals.
Foundational Composition Rules for the Trail
While adventure photography often requires improvisation, certain geometric principles provide a reliable baseline. Guy Tal suggests that “the camera is not where composition happens, it is where composition gets recorded.”
The 3×3 Grid Strategy
The Rule of Thirds is the starting point for landscape photography composition, not the destination. By dividing your frame into a 3×3 grid, you can place your horizon line on the upper or lower third to create more tension and interest than a centered horizon. Place your subject, such as a lone tree or a hiker, at one of the four intersections where the grid lines meet.
Using the Environment as a Frame
Natural framing helps to direct the viewer’s attention and can mask distracting elements. Effective techniques include using:
- Arches or rock formations that encircle a distant peak.
- Tree branches that create a “window” effect in the foreground.
- Canyon walls that lead the eye toward the center of the frame.
This technique adds a layer of depth, making the viewer feel as though they are looking through a portal into the wilderness.
Lighting and Texture: The Secret to Atmospheric Shots
Light dictates the mood and the perceived texture of your adventure shots. Without proper lighting, even a perfectly composed shot will appear flat and lifeless.
Side Lighting for Topography
When the sun is low in the sky, side lighting becomes your most valuable asset. When light hits a landscape from the side, it emphasizes textures and adds depth to the topography. This creates highlights and shadows that define the ridges, valleys, and rocky surfaces of a trail. In contrast, front lighting—where the sun is behind you—tends to wash out these textures, making the scene appear two-dimensional.
Color Theory in the Wild
Understanding how color interacts within a frame can help you guide the viewer’s eye. Color temperature and placement play a role in how depth is perceived:
- Warm colors (red, orange, yellow) tend to come forward in a composition.
- Cool colors (blue, green) tend to recede into the background.
Utilizing the golden hour—the period just after sunrise or before sunset—provides soft, warm light that enhances these color properties, adding a layer of atmosphere that midday sun cannot replicate.
Avoiding Common Pitfalls and Safety Risks
The desire for the “perfect shot” can sometimes lead to poor technical decisions or, more importantly, dangerous physical behavior.
The Danger of the ‘Instagram Shot’
A major pitfall in modern adventure photography is settling for the obvious or “classic” image. Many photographers fall into the trap of recreating the exact same shot seen on social media at famous landmarks. This leads to “proverbial blinders,” where you become so focused on a specific pre-visualization that you ignore the unique, unscripted moments happening around you.
Safety-First Framing: Avoiding Unstable Terrain
Cluttered compositions often occur when a photographer fails to manage background elements. However, the urge to move closer to a subject to “clean up” the frame can lead to overexposure in sunlit trails if you aren’t adjusting your ISO, or worse, a fall on steep terrain. Always prioritize a stable stance over a slightly better angle.
Mobile Composition: Professional Rules on a Smartphone
You do not need a heavy DSLR to capture high-quality adventure imagery. Modern smartphones are equipped with powerful tools that can replicate professional compositional techniques.
Computational Composition
Smartphone cameras rely heavily on computational photography. Using HDR (High Dynamic Range) modes can help prevent overexposure in bright, sunlit hiking environments, preserving detail in both the bright sky and the dark shadows of the trail. Additionally, portrait modes can simulate a shallow depth of field, helping to isolate a subject from a cluttered background.
Using Protune for Latitude
For those using action cameras like a GoPro, accessing the Protune menu is essential. Protune allows for greater latitude when editing by flattening the image, which gives you more control over contrast, saturation, and highlight/shadow detail during the post-processing stage.
The Visual Storytelling Sequence
A single photo is a moment, but a series of photos is a story. To communicate the experience of a hike, adopt a visual flow framework.
Chris Brinlee Jr. approaches photography as a storyteller, which requires a variety of perspectives. Instead of taking ten nearly identical wide shots, use the Wide-Medium-Detail method:
- Wide Shot: Establishes the setting and the scale of the landscape.
- Medium Shot: Focuses on the subject (a hiker or a specific trail feature) within the environment.
- Detail Shot: Captures the textures, such as a close-up of a wildflower or the grit on a climbing rope, to add intimacy.
This sequence ensures that your visual narrative has a beginning, middle, and end.
Final Verdict: The Adventurer’s Mindset
Ultimately, successful adventure photography is not about mastering a checklist of rules, but about embracing a mindset. As Michael Torkildsen describes, composition should be viewed as a dance—a dynamic and responsive process rather than a set of rigid rules to apply mechanically. The best shots are found when you remain present in the environment, ready to react to the light, the movement, and the unexpected.
FAQ
How can I hide crowds in my hiking photos?
Use telephoto compression to flatten the background or utilize extreme foreground elements to mask interference. If you have a tripod, long exposure can also help blur movement, effectively making people appear as ghostly, non-distracting streaks.
What is the best time of day for landscape composition?
The Golden Hour—the period just after sunrise or before sunset—is ideal. This timing provides soft, warm light that adds significant depth and atmosphere to your shots, whereas midday sun often creates harsh, flat shadows.
Should I always follow the Rule of Thirds?
The Rule of Thirds is a starting point, not a destination. Use it to place key elements on a 3×3 grid to create balance, but do not be afraid to break it for intentional symmetry or to emphasize a specific perspective.