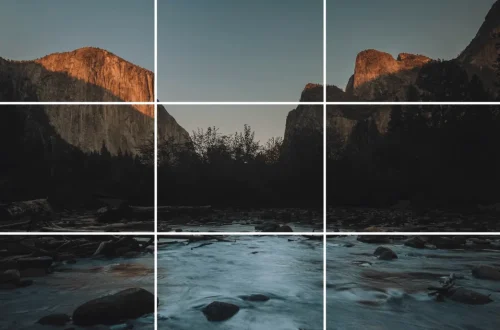
SnapRoamer.com – To master low-light travel photography, you must balance technical exposure settings with intentional framing. Focus on using wide apertures to maximize light, employing high ISO settings for mobility, and utilizing composition techniques like the rule of thirds or leading lines to create depth when light is scarce. A difference of just 3 stops in light can be the gap between a usable shot and a dark failure, such as the jump from f/5.6 to f/2.
Mastering Composition in the Chaos of Night Markets
To compose clean shots in messy, dimly lit environments like night markets, look for geometric shapes and strong leading lines to anchor the frame. Minimize visual clutter by selecting subjects in solid or neutral colors and using light sources—like neon signs or street lamps—as your primary compositional anchors to guide the viewer’s eye.
Finding Geometry in the Crowd
Night markets present a significant challenge due to visual noise. Photographer Belinda Shi suggests that moving camera angles can improve composition, moving away from the standard eye-level perspective. Instead of fighting the crowd, look for repeating patterns or geometric shapes created by stall awnings or vendor carts. If the scene feels overwhelming, try a lower angle to use the ground or street textures to create a cleaner foundation for your subject.
Using Color Contrast for Subject Separation
Visual clutter is the primary failure mode in street photography. Belinda Shi notes that minimizing colors can simplify a photo; specifically, encouraging your subject to wear solid or neutral colors helps prevent them from blending into a chaotic background. By isolating a single color or a neutral figure against a complex backdrop, you create a clear focal point. This technique prevents the viewer’s eye from wandering aimlessly through a messy frame.
- Identify a singular light source to act as a visual anchor.
- Look for leading lines, such as a row of street food stalls, to direct the eye.
- Change your height—crouch low or find an elevated vantage point to simplify the background.
The ‘Light Source as Subject’ Strategy
Rather than viewing a street lamp or a neon sign as a mere utility for illumination, treat the light itself as the primary compositional element. Lume Cube demonstrates that light painting with tube lights can transform a dark scene, but even in standard travel, the light source can anchor the frame. By positioning your subject so they are partially silhouetted by a neon sign or a glowing lantern, you create high-contrast drama that defines the nighttime atmosphere.
A common mistake is attempting to light the entire scene, which often results in flat, uninspiring images. Instead, focus on the interplay between shadow and light. Using a light source as a subject allows you to control the narrative of the photo, using the intensity of the glow to dictate where the viewer looks first. This strategy turns a technical limitation—the lack of ambient light—into a stylistic strength.
Essential Technical Settings for Low-Light Exposure
Achieve proper exposure in low light by using a wide aperture (low f-number) to let in maximum light, increasing ISO (modern cameras can handle up to 12,800), and extending shutter speeds. For stationary subjects, use a tripod for exposures lasting up to 30 seconds; for movement, use shutter speeds like 1/20 or 1/10 for intentional blur.
| Setting | Recommended Value | Primary Purpose |
|---|---|---|
| Aperture | Low f-number (e.g., f/1.8, f/2.8) | Maximize light intake |
| ISO | Up to 12,800 | Increase sensor sensitivity |
| Shutter Speed (Stationary) | Up to 30 seconds | Capture long exposures |
| Shutter Speed (Motion) | 1/10 to 1/20 second | Create intentional blur |
The math of light is unforgul. Canon states that using a wide aperture (low f-number) lets in as much light as possible, which is critical when every photon counts. For example, moving from f/5.6 to f/2 provides a massive increase in light, often spanning 3 stops. However, a wide aperture also reduces your depth of field, meaning your focus must be precise to avoid a blurry subject.
Managing the ISO Noise Trade-off
Darlene Hildebrandt notes that high ISO is a viable option for modern cameras, with settings like 12,800 being manageable in many contemporary sensors. While increasing ISO allows for faster shutter speeds, it introduces digital noise. The goal is to find the “sweet spot” where the image is bright enough to be usable without being overwhelmed by grain.
The Necessity of Stability
Darlene Hildebrandt emphasizes that “A tripod is your friend, I promise.” For landscapes or architectural shots where the subject is still, a tripod allows for exposures lasting 30 seconds or longer. Without it, you risk blurry images caused by camera shake during slow shutter speeds.
Advanced Handheld Techniques for the Mobile Traveler
When traveling, a tripod is often too cumbersome. You can still capture high-quality night shots by utilizing handheld techniques. One effective method is panning: Streethunters.net recommends following your subject with your lens at the same speed to keep the subject sharp while blurring the background into streaks of light. This creates a sense of kinetic energy and motion.
If you need to freeze a walking subject to avoid a messy, unintentional blur, aim for a shutter speed around 1/250 sec, as suggested by iphotography.com. If you want to embrace the night’s energy, use slower speeds for intentional motion blur. To improve stability without a tripod, use “bracing”—lean against a wall, a lamp post, or a vehicle to create a makeshift stable platform.
Shortcut: To quickly switch to a mode that allows manual control over shutter speed, use S or Tv mode on your camera dial.
The Pro Workflow: RAW vs. JPEG in Post-Processing
According to Creative-photographer.com, shooting in RAW format allows you to adjust settings like white balance in Lightroom Classic. This capability is essential when dealing with varying light temperatures. In contrast, JPEG files are limited to the settings determined by the camera at the moment of capture.
| Format | Post-Processing Flexibility | Best Use Case |
|---|---|---|
| RAW | High: Full control over WB and exposure | Critical travel shots and low light |
| JPEG | Low: Limited to in-camera settings | Quick snapshots and social sharing |
Creative-photographer.com notes that with RAW, you can change white balance and color settings in software like Lightroom Classic. This is vital in night photography where light sources vary wildly. For instance, Canon highlights the difference between Tungsten and Daylight white balance; Tungsten settings can neutralize orange street lights and boost deep blue skies, whereas Daylight settings emphasize warmth. If you shoot in JPEG, you are stuck with the color temperature the camera decided at the moment of capture.
Common Pitfalls to Avoid in the Dark
- Blurry images from slow shutter speeds without tripod support.
- Excessive digital noise from over-reliance on maximum ISO.
- Missed focus due to slow autofocus in low light.
- Messy foregrounds that distract from the night landscape.
To mitigate missed shots caused by low light, iphotography.com recommends activating continuous autofocus (AF-C or AI Servo) to help track moving subjects. If the camera cannot find contrast, manual focus may be necessary. Additionally, be mindful of your foreground; a messy, dark foreground in a landscape shot can ruin an otherwise beautiful night vista.
FAQ
How high can I push my ISO without ruining the photo?
While modern cameras can handle up to 12,800 ISO, be aware that over-reliance can lead to increased noise. It is a viable option, but you should balance it with your aperture and shutter speed to find the cleanest possible exposure.
Can I take sharp night photos without a tripod?
Yes, by using techniques like bracing against walls, using faster shutter speeds like 1/250 sec for walking subjects, or embracing intentional motion blur with 1/10 or 1/20 second exposures to capture the atmosphere.
Why is my autofocus struggling in the dark?
Low light conditions often cause slow autofocus. Use Continuous Autofocus (AF-C or AI Servo) to track moving subjects, or try manual focus hacks like pre-focusing on a high-contrast object to ensure your subject remains sharp.